Woops, sorry for the hiatus, I know I suck. I do actually have several posts lined up, but haven't yet found the time to upload pictures. I'll be better about that in the future, I hope.
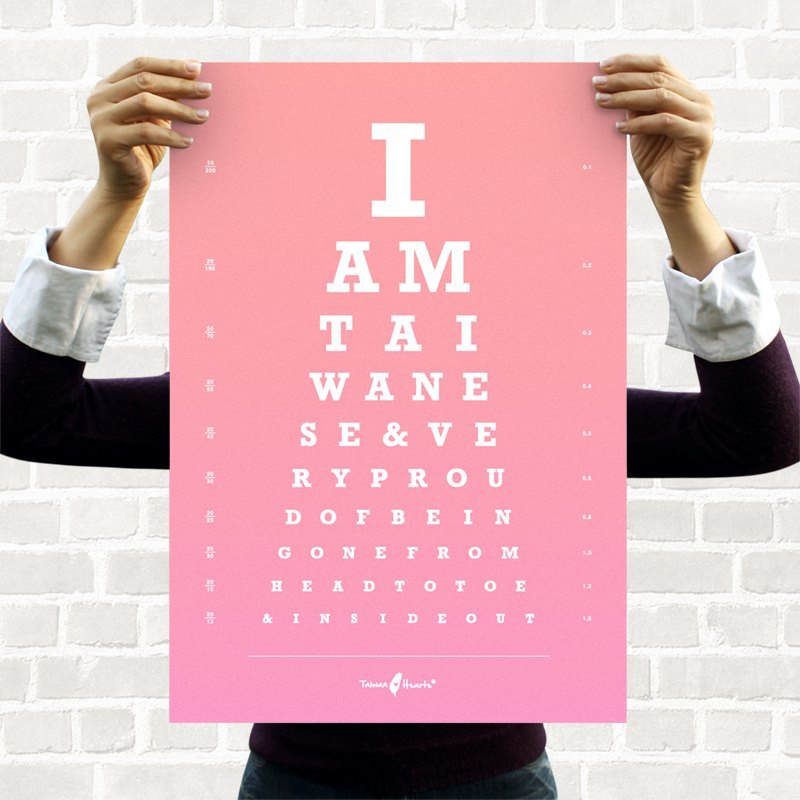
I haven't been shopping for household items or crafting lately because I feel like my apartment is in a pretty good place as is, but if I could read the website (and if they delivered to the US), I would be purchasing this immediately.
Showing posts with label decor. Show all posts
Friday, September 7, 2012
Wednesday, March 7, 2012
dried flowers
I'm reluctant to buy fresh cut flowers for myself, even though I love them, so when I have a chance to take some home for free, I'll always jump at the chance. I've been trying to figure out the best way to dry them in order to stretch out their decor lifespan.. with the limited opportunities I have had, the only advice I can share with you is to hang them upside down while they still look good and then be very, very gentle. I generally like to hang them off cabinets (vs. walls) so that the flower is hanging out in the open and not being shaped by any contact point.
Thursday, February 2, 2012
washi tape clock
Recently felt the urge to jazz up this clock from Target...
...using my newly acquired stash of washi tape from Taiwan.
The great thing about washi tape is that it's very easy to manipulate. It has an adhesive flexibility similar to a post-it note, so you can reposition it often without it losing its grip. It's also kind of stretchy, so if it doesn't line up exactly where you want it to, you can kind of push it into place.
Toyed around with several orientations before deciding to go with the alternating tab & triangle pattern (mainly because I didn't want to waste all those little triangle pieces of tape.. this stuff is too expensive to waste like that!). The final result kind of reminds me of this one pair of Toms Classics that I've been eyeing since December.
| oh herro reflection. |
...using my newly acquired stash of washi tape from Taiwan.
The great thing about washi tape is that it's very easy to manipulate. It has an adhesive flexibility similar to a post-it note, so you can reposition it often without it losing its grip. It's also kind of stretchy, so if it doesn't line up exactly where you want it to, you can kind of push it into place.
Toyed around with several orientations before deciding to go with the alternating tab & triangle pattern (mainly because I didn't want to waste all those little triangle pieces of tape.. this stuff is too expensive to waste like that!). The final result kind of reminds me of this one pair of Toms Classics that I've been eyeing since December.
Saturday, January 14, 2012
art for ze bathroom
Because why not? It's a room you look at every day, so it might as well pretty.
The frame was picked up from a local thrift store in their free bin. Why they would throw away such a thing is beyond me. Though it was missing glass and backing, it had a wire for hanging and was otherwise sturdily constructed, so I swooped it up along with another frame that was slightly more disheveled - more on that one to come!
Because these are on the smaller side and would look weird on my giant walls, the frames sat around for a while. One day as I was hanging out in the bathroom, I noticed that there was a small hole right in-between the two hooks that had been removed by the previous tenant. Eureka moment, commence. I quickly scurried off to construct something that would cover up the unsightly holes and add some oomph to the room.
Because the frame was so light and thin, I wanted to use materials that wouldn't bog the whole thing down. I ended up going with a plastic sheet protector as my "glass" and a file folder as my backing (cardboard would've been too thick). There were already nails in the frame to hold the contents in place, so once everything was nicely trimmed down to 8x10, it was a cinch to put together.
Not sure how well the whole thing is going to hold up against the moisture in the room, but I'm willing to take my chances.
The frame was picked up from a local thrift store in their free bin. Why they would throw away such a thing is beyond me. Though it was missing glass and backing, it had a wire for hanging and was otherwise sturdily constructed, so I swooped it up along with another frame that was slightly more disheveled - more on that one to come!
Because these are on the smaller side and would look weird on my giant walls, the frames sat around for a while. One day as I was hanging out in the bathroom, I noticed that there was a small hole right in-between the two hooks that had been removed by the previous tenant. Eureka moment, commence. I quickly scurried off to construct something that would cover up the unsightly holes and add some oomph to the room.
![]() |
| before & after |
Because the frame was so light and thin, I wanted to use materials that wouldn't bog the whole thing down. I ended up going with a plastic sheet protector as my "glass" and a file folder as my backing (cardboard would've been too thick). There were already nails in the frame to hold the contents in place, so once everything was nicely trimmed down to 8x10, it was a cinch to put together.
Not sure how well the whole thing is going to hold up against the moisture in the room, but I'm willing to take my chances.
Friday, January 6, 2012
pillow covers
When I develop a liking for something, it usually becomes an intense obsession that can last for years before it dwindles down to a healthy pastime or general thing of interest. Past examples: making glass beaded bracelets, Jeremy Bloom and Korean dramas. Now that the Korean drama train is kind of losing steam, I've been looking for something new to preoccupy myself with...and then I discovered handmade pillow covers.
So fun. So easy. So (arguably) useful. And you can get great pillow inserts from IKEA for $3 each (I prefer the ones filled with polyester batting vs. their crappy down feathers). I basically destroyed the house last week during my hunt for suitable fabric, even threatening to cut up some of my brother's shirts. I actually did end up using 2 of his old turtlenecks and if he regrets giving them to me, it's far too late now.
I followed this video tutorial to make the envelope pillow covers. I ended up making 7 in all, with 2 of them being failures (note to self: sheer curtain material does not go through a sewing machine well). I was going to make another one of the red/white floral cover because I thought it was a fresh and fun pattern, but then my brother said the pattern reminded him of boxers and my sister said it made her think of pajamas, so I gave up on that. Still crying about it inside though, just a little.
So fun. So easy. So (arguably) useful. And you can get great pillow inserts from IKEA for $3 each (I prefer the ones filled with polyester batting vs. their crappy down feathers). I basically destroyed the house last week during my hunt for suitable fabric, even threatening to cut up some of my brother's shirts. I actually did end up using 2 of his old turtlenecks and if he regrets giving them to me, it's far too late now.
I followed this video tutorial to make the envelope pillow covers. I ended up making 7 in all, with 2 of them being failures (note to self: sheer curtain material does not go through a sewing machine well). I was going to make another one of the red/white floral cover because I thought it was a fresh and fun pattern, but then my brother said the pattern reminded him of boxers and my sister said it made her think of pajamas, so I gave up on that. Still crying about it inside though, just a little.
Sunday, December 11, 2011
merry christmas!
In the spirit of the holidays, I decided I wanted a tree. But I didn't want to pay for it. Doh. Lucky for me, there are enough thrifty people/small apartment dwellers that HP felt compelled to create this free printout, which was then picked up on Apartment Therapy and propelled through the Pinterest world. I know it's a little (ok a lot) ghetto, but do I get points for hanging ornaments? They were leftovers from a failed project, but I think they still look okay...
Finding a place to hang this picture up was kind of a ridiculous experience. It's only four feet tall, so putting it near the ground would make it basically unnoticeable. After a lot of pacing around the room, I eventually decided my best option was to have it floating above my chair. That corner is already super awkward, so I guess this tree can just highlight that.
Monday, December 5, 2011
oh hey look, real art
You know how out there in the interwebs there are blogs and Facebook pages offering giveaways of gorgeous, expensive objects? And you enter all of them knowing that really, it's all for nothing? I mean, seriously, especially when you have only one chance to enter, what are the odds?
Luck was clearly on my side this time around, because I ACTUALLY won something. And not just something that would be nice to have because it's free, but a gorgeous something that I'm over the moon about owning:
It was love at first sight when I spotted this print on decor8. It's girly with an edge and is rocking my favorite pattern and color combination of the moment. I also won Jonathan Adler's book on chic accessorizing with my print. Thanks again, {COZAMIA}, my home (and library) is a prettier place thanks to you :)
Luck was clearly on my side this time around, because I ACTUALLY won something. And not just something that would be nice to have because it's free, but a gorgeous something that I'm over the moon about owning:
via {COZAMIA}
It was love at first sight when I spotted this print on decor8. It's girly with an edge and is rocking my favorite pattern and color combination of the moment. I also won Jonathan Adler's book on chic accessorizing with my print. Thanks again, {COZAMIA}, my home (and library) is a prettier place thanks to you :)
![]() |
| other favorites from her shop |
Friday, November 18, 2011
in an ideal world...
my home would have interiors like these.
I've been trying to define my aesthetic with some difficulty - I find myself swooning over minimalistic industrial spaces and then gushing over cluttered, granny-chic rooms two seconds later. In the end though, I think I just want my living space to be warm. I want to walk in after a long day and feel like I'm getting a giant, plushy, comforting yet energizing ambient hug. To put it another way, I want to be this cat and my home to be this bear.
I'm certain this feeling can be achieved if I acquire an excessively high pile rug like the one below. It looks like freakin' snow that is perfect because it's not cold or wet. Must. Have.
via delikatissen
via pinterest
via Design Attractor
I've been trying to define my aesthetic with some difficulty - I find myself swooning over minimalistic industrial spaces and then gushing over cluttered, granny-chic rooms two seconds later. In the end though, I think I just want my living space to be warm. I want to walk in after a long day and feel like I'm getting a giant, plushy, comforting yet energizing ambient hug. To put it another way, I want to be this cat and my home to be this bear.
I'm certain this feeling can be achieved if I acquire an excessively high pile rug like the one below. It looks like freakin' snow that is perfect because it's not cold or wet. Must. Have.
via Style at Home
Tuesday, November 8, 2011
recipe envelopes
Created out of book pages (more on that to come). For now I've been printing out very simple (and short!) recipes on index cards, but I might have to rethink the system as I move on to more complicated recipes. The flowers were originally hung just to dry, but they are so fragile that now I'm afraid to move them and risk them falling pieces. I guess they look nice as is, right?
Had to purchase those corkboards (wah) for about $2 each, bringing the grand total project costs to $4.
Thursday, October 27, 2011
local eye candy
Some of my favorite pieces at a local gallery opening:
1. Paper vases by Hiroshi Kajimoto
2. lace platters by Pasabahce
3. Crochet Table by Marcel Wanders - constructed of cotton and epoxy, it was ridiculously stiff!
4. nail table by Peter Sandback
5. drum table by Peter Sandback
I was a huge fan of both Sandback tables, particularly the nail table. The red oak was baked to caramelize the sugars in the wood, thus creating that deep brown color. Then about 3000 aluminum nails were drummed in, sawed even, and sanded flush with the table to create that gorgeous surface pattern.
A new dream of mine is to have a house with a giant garage and/or yard and an endless supply of power tools so that I too can try my hand at projects like these. Until then, I shall admire from afar.
Sunday, October 23, 2011
i got (more) furniture
OMG I'm so excited to share this new acquisition.
Things have been pretty calm on the interior editing front. I'm tinkering with a few handmade decorative items and still popping by flea markets to look for little pieces of flair, but in general, my place is pretty set, especially with regards to the major pieces.
But then this weekend happened.
A friend, MC, came to visit and I talked her into perusing a nearby flea market with me before we went shopping at "normal" places. As we wandered around the blocks looking at the generally underwhelming selection, we came upon an antique furniture store that had set out some of its wares on the sidewalk. I have been to this store before and had every intention of just walking on by, but something caught my eye mid-way down the perpendicular street. I don't know what was originally so captivating to me - I think maybe it was the color? - but MC and I made our way to investigate further and came across these wonderful wonderful chairs.
Things have been pretty calm on the interior editing front. I'm tinkering with a few handmade decorative items and still popping by flea markets to look for little pieces of flair, but in general, my place is pretty set, especially with regards to the major pieces.
But then this weekend happened.
A friend, MC, came to visit and I talked her into perusing a nearby flea market with me before we went shopping at "normal" places. As we wandered around the blocks looking at the generally underwhelming selection, we came upon an antique furniture store that had set out some of its wares on the sidewalk. I have been to this store before and had every intention of just walking on by, but something caught my eye mid-way down the perpendicular street. I don't know what was originally so captivating to me - I think maybe it was the color? - but MC and I made our way to investigate further and came across these wonderful wonderful chairs.
| Chillin on the street, because that's what I do. |
With their gorgeous herringbone pattern and light, springy bamboo construction, it was kind of love at first sight. I poked around for a price tag but couldn't find anything; MC posited that perhaps they were free and we should run off with them right away. Oh, how I wish that was the case.
Instead they were $125 for the set - supposedly never used and just unearthed from the warehouse two weeks ago. And so the internal debate commences. Do I need chairs? What am I going to do with four chairs when I only really need two? Am I seriously considering buying furniture right now? I guess the folding chairs I own are a little ghetto... but seriously am I going to buy chairs today?? But I love them..
Eventually I decided that I had to have them and forced MC to go in and negotiate the price down for me. He pretty easily agreed to go to $110 with free delivery, but when we pressed for $100, he said that would only be possible if I moved them myself. As I always am looking to save the extra money, I immediately agreed and sealed the deal. The hilarious thing is that MC had to carry two of them for me, and for those that know MC, they know that she is not a fan of manual labor. Also she was totally my guest who caught an 8am Saturday bus to come see me, and pretty much the first thing I do is make her move furniture. Whatever, I bought her lunch :P
Despite the price tag, I think these chairs were totally worth it, especially after a random lady stopped us on the street to gush about how GORGEOUS these were and how much she LOVED them. We even missed a traffic light as we listened to her excited babble. Obviously though, I can't judge her for her enthusiasm - look how pretty this pattern is!
In general, I think they class up my dining area and remedy the "poor student" look I kind of had going on, even if only slightly. I know my mom is going to kill me for bringing in what she would call clutter, but whatevssss!
Saturday, October 15, 2011
look ma, i made this
I have a love-hate relationship with Anthropologie. I hate their excessive prices, but their stores are always so pretty and well-stocked with baubles that I can't help but return every week, just to look around. Lucky for me, every once in a while, Anthro sometimes indulges cheapskates like me by hosting awesome open events where attendees can walk away with free swag.
This week saw the kick-off of a two-week design festival in the city, and Anthropologie played host to several events. The first was a lecture from their big-shot buyer, Keith Johnson, who shared stories about his travels around the globe while hunting for goods to bring back to the store. It was really interesting and entertaining, but he pretty much convinced me that I should never shop at Anthropologie because all their best items come from flea markets anyways.
The second event I attended was a jewelry making workshop with one of their local designers, Lenora Dame, and it was SO. MUCH. FUN. Seriously, I wish I had more liberal parents who indulged my artistic interests when I was a child. Alas, crafting will remain a hobby for now.
![]() |
| The final product, all supplies provided by Lenora Dame and Anthropologie |
We were provided everything - the cuffs, fabric and "bling" (the designer's term, not mine). After Lenora and her team showed us how to wrap the fabric neatly, we were given 45 minutes to construct our collages of bling. This adorable older couple a few seats away from me was having so much fun, it was kind of ridic. I hope someday I marry a guy who will attend these kind of things with me and be as enthusiastic as this man was.
Obviously the best part of the whole event was that it was free. Thanks Anthro!
Thursday, October 13, 2011
american swedish heritage museum: 17 designers
A couple weekends ago I moseyed my way down to the American Swedish Heritage Museum to check out their exhibit featuring the works of these 17 female designers.
It was a small exhibit and I'm secretly glad I didn't shell out $8 for admission (open houses ftw!), but how great are these chairs?! I would love to have the grey one in my future grown-up home.
Sunday, September 4, 2011
cake dummies
My latest snag off of Craigslist. I don't know what I'll do with them yet, but as some of these cost $9 each, I'm currently content with just having them.
Thursday, August 25, 2011
a new friend
A good friend came to stay with me for a night and for a thank you present, she got me a new basil plant! We were just talking the night before about how I probably should look into a basil or parsley plant so I can be more adventurous with cooking while adding some greenery to the room.
Totally unexpected find when I returned from work but it totally made my day. Thanks a ton SL!
Tuesday, August 16, 2011
gallery wall
I can't remember the last time I've been so determined to (successfully) complete something. I guess that's a little sad considering all the more productive things I could try my hand at, but hey - everyone has their passions. I ran into so many frustrating obstacles during the making of this that at one point, I felt a little faint from exhaustion. But I pushed through and couldn't be happier with the final product; I hope you like it too!
Inspired by this post, I had my mom search the house for a variety of shoebox covers and bring them to me when she came to visit. (Later, the sight of her and my aunt toting shopping bags filled with box tops was super cute - I really love my family sometimes.)
And then the execution of the project nearly destroyed me.
First order of business was masking the covers. I bought spray paint and then realized I didn't really have the appropriate space to paint. So then I bought white acrylic paint, but it made the box soggy and saggy. To remedy that situation, I then tried to decoupage marbleized paper, but now the covers were not only still saggy, but now also sticky and flaky. Disgusting.
Finally I decided to go with white artist tape, which I wrapped around all the visible areas of the box top. I was pretty meticulous about lining up the rows of tape exactly at the edge to ensure that the color was uniform (i.e. no super-white lines from overlapping tape). Sometimes the images on the covers were still visible underneath the tape, but a light coat of the white acrylic paint on top of the tape sufficiently covered that up. This was by far the cleanest cover-up option AND it helped to strengthen the damaged and weak boxes.
After generating several different arrangements and using shoddy Powerpoint tricks (yes, Powerpoint.) to view the different placement options, I decided on one and used masking tape outlines to help with the physical arrangement on the wall.
Attaching the box tops was the second biggest challenge of the project. My original intention was to have the top of the box facing you, but my unwillingness to use nails or splurge on 3M hooks nixed that idea. After deciding to flip them around, I then tried to use those plastic bulletin board push pins, but that just resulted in small, useless holes in the wall and lots of shards of plastic from hammering the pin top too hard. Eventually I settled on lots of masking tape (packing tape for the larger boxes) and mounting putty. There's still a great chance that these boxes will come tumbling down on me in my sleep, but whatevsss.
FINALLY I was at the fun part - filling the panels.
- The circle shingles are probably my favorite not only because I think they look nice, but because they were also ridiculously easy to put together. Once you prepare the appropriate amount of circles (I used the inside of a tape roll as stencil), simply tape the circles by the edges and layer. Each of my layers cover half of the one below.
- Garland cut from a wallpaper sample I found in a magazine. String was previously used to hold ba zhang (肉粽) together. Yay for recycling. ^.^
- The quatrefoil design is made of toilet paper rolls, with each leaf cut to be 1cm thick. (At 1cm each, 1 TP roll should yield 11 "leaves")
- The artwork belongs to Ana Montiel except for the seaweed looking one. I forgot where I found that :( If someone randomly comes across this and knows where it's from, please tell me!
- Garland from Better Homes & Gardens paint chips (I found mine at Walmart), which conveniently have random perforated circles.
And there you have it. Having bought the bed frame from the previous tenant, I was a little unhappy with the harsh black, but with new sheets and this picture display, I feel that I finally achieved the sense of airy comfort that I was striving for. I decided to modify Kelly Sutton's suggestion and only focus the gallery in the "sleeping area" because I think I would rather create very defined sections within my studio rather than let that whole side of the room be viewed as one.
Total project costs: $15.30
- Mounting putty (CVS): $3.23
- Artists tape (Utrecht): $6.47
- Acrylic paint (Utrecht): $3.45
- Sponge brushes (Dollar Zone): $1.08
- Glue (Dollar Zone): $1.07
Not free :( but still pretty sweet :)
Thursday, August 11, 2011
paint chip art
Saw this project on my new favorite blog How About Orange and immediately added it to my To Do list.
via How About Orange
Without a frame, mat, or paint chips on hand, I figured this project would be sitting in the queue for a while. Then the next weekend, I had magically acquired both a frame (courtesy of Craigslist) and a TON of paint chips (courtesy of Walmart).
Let the obsessive crafting commence. Every morning I would wake up and cut a few triangles during breakfast. Then I would come home and cut triangles all night. I didn't even watch any Asian dramas during this construction process, I was that focused. Perhaps it would've been more efficient to decide on a color scheme before going to town on all those paint chips, but I'm not very good at visualizing/planning ahead like that... and let's be honest, as long as I have a peach Snapple, a nice smelling candle, and an excellent playlist, I could do this all day.
It's not perfect, and it probably would've helped if I had an actual paper cutter, as I suspect the blogger did, but one could argue the handmade mat & imperfect triangles add some charm, no? Let's just say yes.
Thursday, August 4, 2011
fabric project 3: wall decals
I have a new favorite Bravo show called Million Dollar Decorators. It's freakin' hilarious and while the final designs are usually too over the top for me, they're still pretty fun to look at.
Anyhoo. I bring this up because despite the fact that I can't really relate to much on the show, it has inspired me to think bigger and get out of the itty-bitty-project mindset that I've been stuck in up to this point. I guess it's time for me to realize that with ceilings as high as mine, the little tissue flowers and single line photo displays just aren't going to cut it.
And so last night I decided to expand upon a project I had been tinkering with for the past week, using leaves cut from fabric.

First I tried to create a visual of "falling leaves", but the contrived randomness just wasn't doing it for me. Then I decided to acknowledge my need for order by lining things up. Then finally I had an "f--- it" moment and just started sticking things to the wall.
Pleased with my progress, I decided to move it to my desk wall and make it significantly larger to create a "statement piece" (the Bravo designers loooooovee statement pieces).
Don't you love it? Well actually, I don't care if you don't (looking pointedly at you, cousins+siblings), because I do. I like that the fabric curls on its own to add dimension and weight to the whole thing. I also like that it didn't cost me anything and I got a good back/shoulder work-out during the construction process.
Anyhoo. I bring this up because despite the fact that I can't really relate to much on the show, it has inspired me to think bigger and get out of the itty-bitty-project mindset that I've been stuck in up to this point. I guess it's time for me to realize that with ceilings as high as mine, the little tissue flowers and single line photo displays just aren't going to cut it.
And so last night I decided to expand upon a project I had been tinkering with for the past week, using leaves cut from fabric.

First I tried to create a visual of "falling leaves", but the contrived randomness just wasn't doing it for me. Then I decided to acknowledge my need for order by lining things up. Then finally I had an "f--- it" moment and just started sticking things to the wall.
Pleased with my progress, I decided to move it to my desk wall and make it significantly larger to create a "statement piece" (the Bravo designers loooooovee statement pieces).
Don't you love it? Well actually, I don't care if you don't (looking pointedly at you, cousins+siblings), because I do. I like that the fabric curls on its own to add dimension and weight to the whole thing. I also like that it didn't cost me anything and I got a good back/shoulder work-out during the construction process.
Monday, August 1, 2011
fabric project 2: kitchen table
The day after I moved in, I picked up this table outside my apartment (it was right outside!! I wasn't actively searching through the trash!)
I knew it would be an ideal kitchen/dining table, so I ignored the surface scratches and brought it up. I had been mulling over several ideas to try and cover the surface defects: sand and repaint, decoupage with wallpaper/magazine clippings (see the last dresser in this entry), or just slap on a table cloth.
After I acquired my fabric stash, I spent a day rummaging through it and playing with the different pieces. I didn't have anything big enough to serve as an actual table cloth, so eventually I decided on this:
The piece was just big enough so that I could tuck an inch of fabric under each side of the table and secure it with a generous amount of packing tape. Perhaps not the most sophisticated construction method, but it's working for now. My sister gave her stamp of approval, calling it "shabby chic".
And the best part of all is that it was all free!
I knew it would be an ideal kitchen/dining table, so I ignored the surface scratches and brought it up. I had been mulling over several ideas to try and cover the surface defects: sand and repaint, decoupage with wallpaper/magazine clippings (see the last dresser in this entry), or just slap on a table cloth.
After I acquired my fabric stash, I spent a day rummaging through it and playing with the different pieces. I didn't have anything big enough to serve as an actual table cloth, so eventually I decided on this:
The piece was just big enough so that I could tuck an inch of fabric under each side of the table and secure it with a generous amount of packing tape. Perhaps not the most sophisticated construction method, but it's working for now. My sister gave her stamp of approval, calling it "shabby chic".
And the best part of all is that it was all free!
Thursday, July 28, 2011
design dilemma semi-solved
Kelly replied! Because I told her that I didn't want to nail anything into the walls, she suggested that I either (1) paint really large canvases and prop them against the wall or (2) create fabric panels and hang them via the 3M sticky hooks.
I already had a panel project on my to do list, so I might take a stab at option 2 first. If it turns out mad ghetto, I'll consider shelling out for something more substantial, but paying for things is never as fun as getting them for free..
Subscribe to:
Posts (Atom)


